How To Install Cabinet Lights In Kitchen - Ingenious Kitchen Cabinet Lighting Solutions - Clamp each cable to the light as you would clamp cable to a box.
byAdmin-
0
How To Install Cabinet Lights In Kitchen - Ingenious Kitchen Cabinet Lighting Solutions - Clamp each cable to the light as you would clamp cable to a box.. Just as in step 2 of the under cabinet section, start in the cabinet above the microwave. Go to the main electrical panel and turn off the power to the existing under cabinet lights and outlets. Ream the cut end of the flex to remove burrs and install flex connectors on both ends. Flex for each light or group of lights, for the switch and for the power (photo 4 and figure a). Create a floating effect in the kitchen by installing led strip lights within the skirting of the base cabinets.
Professional lighting expert jason walks you through the everything you need to know about the basics of under cabinet lighting. A set of brackets are attached to the cabinet, and the light is snapped into place. Ream the cut end of the flex to remove burrs and install flex connectors on both ends. The actual installation is fairly straightforward, but the hard thing is that most kitchen setups and layouts are different. You can simply tap into an existing light switch in your kitchen and just turn it into a double switch.
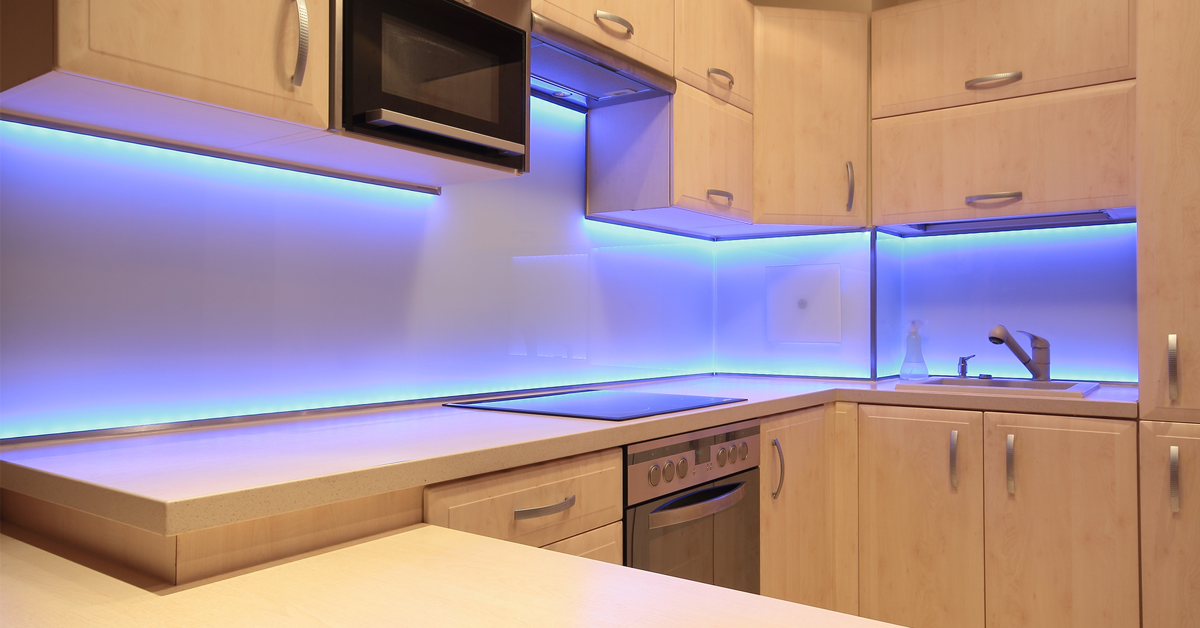
Kitchen Inspiration: Under-Cabinet Lighting | The Lark from www.larkandlarks.co.uk Clamp each cable to the light as you would clamp cable to a box. These often come with an adhesive backing or clips, so it just takes a few seconds to attach it under the cabinet. 24+ how to install lighting inside kitchen cabinets gif. Center the fixture front to back or place it slightly closer to the front of the cabinet. How to make an organza light curtain. Then adjust the color to whatever you like depending on kitchen decoration style and your preferences, and make the kitchen exude a. Create a floating effect in the kitchen by installing led strip lights within the skirting of the base cabinets. Of flex where it enters the walls.
Go to the main electrical panel and turn off the power to the existing under cabinet lights and outlets.
Use a slotted screwdriver to pry the round knockout plug from the rear of the light fixture. Then adjust the color to whatever you like depending on kitchen decoration style and your preferences, and make the kitchen exude a. Here you will see how easy i. Center the fixture front to back or place it slightly closer to the front of the cabinet. Insert wire (long enough to cover the window gap and feed into the next cabinet) through the side of your cabinet, and secure it in the other side of the terminal block. Unscrew the old light fixtures from the underside of the cabinets. By far the hardest part of installing under cabinet lighting in the kitchen using led light strips is buying the supplies. Of flex where it enters the walls. An alternative to this though is using a cabinet hanging rail system like the one from eazyhang. Attach the lights disassemble the lights and remove the lens and fluorescent tubes. The tricky part is attaching the dimmer to the strip, and the dimmer to the step down transformer, if needed. Have a helper hold the light as close to the rear wall as possible while you drive screws through the light and into the underside of the cabinet. You can simply tap into an existing light switch in your kitchen and just turn it into a double switch.
It's a fast, easy project t. There was a time when installing under cabinet lighting meant picking between chunky, flickering in kitchens where wall cabinets change the height, such as to a shorter one above a sink, run wiring inside the adjacent taller. Mounted lights are a little more sturdy. Flex for each light or group of lights, for the switch and for the power (photo 4 and figure a). Allow an extra 6 in.
Holiday Gifts For Your Favorite Chef | Pegasus Lighting Blog from blog.pegasuslighting.com An alternative to this though is using a cabinet hanging rail system like the one from eazyhang. Then adjust the color to whatever you like depending on kitchen decoration style and your preferences, and make the kitchen exude a. By far the hardest part of installing under cabinet lighting in the kitchen using led light strips is buying the supplies. To achieve this effect there should be a minimum gap of 4 inches between the flooring and the base cabinet. The strips come in roles, and you just need to measure the cabinet and cut the right length of strip light. Allow an extra 6 in. Replace the bulb compartment and lens. Inside your cabinet, insert the end of the connector's wires into a terminal block.
Just as in step 2 of the under cabinet section, start in the cabinet above the microwave.
This is a great way to provide night illumination and create a pathway lighting within the kitchen. Clamp each cable to the light as you would clamp cable to a box. It's a fast, easy project t. Allow an extra 6 in. Flex for each light or group of lights, for the switch and for the power (photo 4 and figure a). Professional lighting expert jason walks you through the everything you need to know about the basics of under cabinet lighting. Demonstrated by terry peterman, the i. To achieve this effect there should be a minimum gap of 4 inches between the flooring and the base cabinet. Of flex where it enters the walls. Center the fixture front to back or place it slightly closer to the front of the cabinet. Have a helper hold the light as close to the rear wall as possible while you drive screws through the light and into the underside of the cabinet. Replace the bulb compartment and lens. Just as in step 2 of the under cabinet section, start in the cabinet above the microwave.
The power that already goes to that switch should be sufficient to also power your under cabinet lights. Center the fixture front to back or place it slightly closer to the front of the cabinet. Clamp each cable to the light as you would clamp cable to a box. Just as in step 2 of the under cabinet section, start in the cabinet above the microwave. The actual installation is fairly straightforward, but the hard thing is that most kitchen setups and layouts are different.
Under Cabinet Lighting - Low Voltage - Contractor Talk from www.contractortalk.com Rope lights rope lights fasten to the tops of cabinets with plastic clips that you secure to the cabinetry with small screws. Just as in step 2 of the under cabinet section, start in the cabinet above the microwave. Replace the bulb compartment and lens. Have a helper hold the light as close to the rear wall as possible while you drive screws through the light and into the underside of the cabinet. Ream the cut end of the flex to remove burrs and install flex connectors on both ends. Keep the lights close to the front the wall cabinet, positioning the light over the center of the countertop. Attach the lights disassemble the lights and remove the lens and fluorescent tubes. Mounted lights are a little more sturdy.
Create a floating effect in the kitchen by installing led strip lights within the skirting of the base cabinets.
Rope lights rope lights fasten to the tops of cabinets with plastic clips that you secure to the cabinetry with small screws. Replace the bulb compartment and lens. Professional lighting expert jason walks you through the everything you need to know about the basics of under cabinet lighting. The tricky part is attaching the dimmer to the strip, and the dimmer to the step down transformer, if needed. Plan location and spacing lay out lights on countertop, directly under the intended installation location, spacing lights less than 13 inches apart. Mount the housing to the cabinet with two screws. Inside your cabinet, insert the end of the connector's wires into a terminal block. A set of brackets are attached to the cabinet, and the light is snapped into place. Have a helper hold the light as close to the rear wall as possible while you drive screws through the light and into the underside of the cabinet. To achieve this effect there should be a minimum gap of 4 inches between the flooring and the base cabinet. Use the hole to route the power cord through to the inside of the cabinet. Insert wire (long enough to cover the window gap and feed into the next cabinet) through the side of your cabinet, and secure it in the other side of the terminal block. One of the first steps in how to install under cabinet lighting is finding the power source.